The process of measurement matters in widening the quantitative aptitude of students
Ankit Shukla in At Right Angles magazine describes and reflects upon the classroom experience of helping a cohort of children understand the concept of measurement using activities.
This article describes and reflects upon the classroom experience of helping a group of children understand the concept of length.
The activities are inspired by the Measurement PullOut published with the July 2015 issue of At Right Angles available at At Right Angles_July_2015-Vol 4‑no-2-July 2015-Pullout-Measurement.
During the period when I did my fellowship with Azim Premji Foundation, I had to visit schools regularly as part of my School Understanding Process.
On one of these visits, a teacher who taught mathematics to class 5 students requested that I have a discussion with the students on the measurement of length as he felt that the students had just crammed the units used to measure length along with the process of inter-conversion of these units.
He felt that they lacked conceptual understanding of the topic as they didn’t know why these units were required, when to use which units, how to use a metre tape, etc. Accordingly, my colleague from the Foundation and I designed a plan with the teacher.
The plan was woven around some activities which were designed in a sequence so that they would allow students to build an understanding of the related concepts.
On day 1, we would do some activities which would help them to conceptualise and estimate length.
Then on day 2, we would move to units of length after which we would provide them with some hands-on experience in measuring the lengths of different objects.
Understanding the Concept of Length
To get an understanding of length we did the following activities:
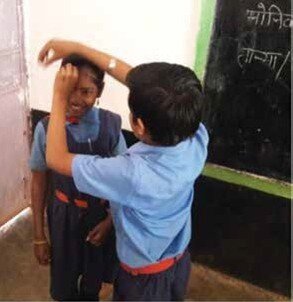
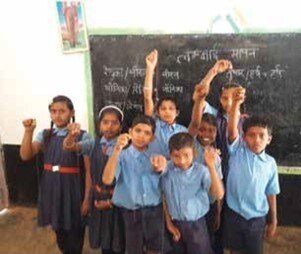
In the first activity, we divided the class into pairs. Each pair had to find out who was the taller of the two. They compared their heights by standing next to each other. Children participated very actively and figured this out easily.
In the second activity, they were asked to compare the height of the door of the classroom to the height of the shutter of the main door of the single-storey school building.
In this case, they couldn’t compare the heights of the objects by keeping them side by side.
Some children just guessed that the shutter was longer than the door. But some students held a broomstick and extended their arm until the top of the broomstick reached the top of the shutter.
Then they moved forward, holding the broomstick in the same position until they reached the door of the classroom. The top of the broomstick was lower than the top edge of the door. So, they claimed that the door was slightly higher than the shutter.
The third activity was about thickness – a related concept. They were divided into pairs again, each pair was given a thread and asked to compare the circumference of each other’s heads using the reasoning that the larger the circumference, the greater the thickness (diameter of head).
In this case, whoever’s thread was longer, had the larger circumference.
After this, they chose to revisit the door and the shutter. The thread was used to measure the height of each and then both were found to be of the same height! This was followed by a discussion on length and its properties.
We discussed that length is the characteristic of the object in which we define how long (or high, or wide) it is. Here, we assume that the measure is in continuum, that is, the object is not in fragmented sections. We also discussed the difference between length and distance.
For example, we usually say that distance between place A and B is so and so. We never say that length between A and B is so and so. However, we may speak of the length of the road which connects places A and B.
Then we discussed about the basic properties of length measurement which are as follows:
- Length of an object does not depend on the orientation of the object.
- Length never changes no matter which scale/ unit you use.
- It is independent of the unit of measurement. i.e. in whichever unit you measure, the length remains the same. However, its representation may differ in different units.
Then as a part of homework, I asked them to find out the longest object in their home. On the next day, the students came up with answers as follows:
Monika: Wall of the house
Renuka: Wooden beam of the roof
Neeraj: Electric wire
Ghanshyam: Bamboo Stick
Leman: Rope used for drying clothes
Units: Need for and Conversions
On day 2, we got into units. After a brief revision of the previous day’s discussion, we discussed some ancient measurement techniques which we still use sometimes.
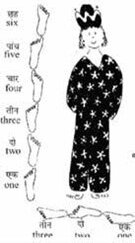
We talked about measuring length by using our body parts and some students elaborated what they use viz. hands as ‘haath’, fingers as ‘anguls’, full stretch from thumb to little finger as ‘beeta’.
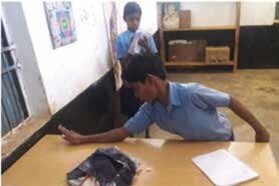
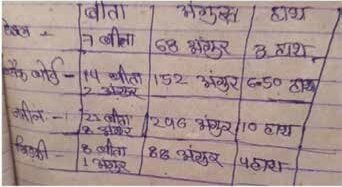
Then I asked them to measure some objects with each of these three units and record the data in the given format.
| Object | Handspan (Beeta) | Fingers (Angul) | Hands (Haath) |
|---|---|---|---|
| Table | |||
| Window |
They diligently measured each object, and it took a long time. Then they recorded the readings in their notebooks. Then I asked them to compare the readings with each other. It was observed that no two readings were the same.
Therefore, using body parts as unit of measurement is not good as it differs from person to person.
The following story helped the students to internalise this idea.
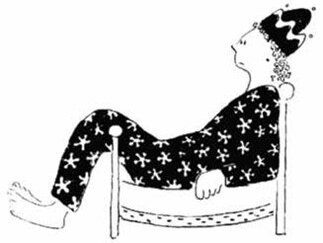
Once upon a time, a king thought of giving his queen a new bed on her birthday.
The carpenter needed the measurements for the bed, so that it would be both long enough and wide enough to fit the queen comfortably.
So, the queen was asked to lie on the floor while the king measured with his foot – 3 feet wide and 6 feet long. But then the bed was made based on the little feet of the apprentice of the carpenter.
Naturally, though beautiful, it was too small for the queen.
The king was angry and as a result the apprentice was put in jail.
But there the latter pondered over what went wrong and realized that he needed to know the size of the king’s foot to make the bed. So, a marble copy of the king’s foot was made and sent to the apprentice.
Another bed was made with the help of the marble foot. Of course, it was a perfect fit for the queen and just in time for her birthday!
Since then whenever anything needed to be made based on the size of the king’s foot, the marble foot was used.
The fourth activity was to use a measuring tape (like the one a tailor uses or the type we get in a hardware store). We divided the class into pairs and asked them to measure each other’s height with the tape.
Some students were able to measure with the tape while some could not and were helped by the other students.
The heights of some of the children were as follows:
| Name | Length |
|---|---|
| Ritik | 1m 40 cm |
| Renuka | 1m 45cm |
| Tanya | 1m 41cm |
| Niraj | 1m 31cm |
| Ghanshyam | 1m 38cm |
They were then asked to arrange themselves in the ascending order of their heights. This enabled them to arrange the numerical values of the heights in ascending or descending order. This in turn gave them some idea on how to compare lengths/heights expressed in such mixed units.
The students already knew a little bit about unit conversions. They were aware that there are 100 centimetres in 1 metre, and 1000 metres in 1 kilometre. They knew that a metre is longer than a centimetre.
We had a discussion with the students on the different units which are used nowadays. I told them that to convert from a larger unit to a smaller one, one has to multiply and to convert from a smaller unit to a larger one, one has to divide. For example, in the question,
5 m =__________ cm, metre is the larger unit compared to centimetre, so you must multiply it with 100 while in another one,
14 cm =_________ m, centimetre is the smaller unit compared to metre so you have to divide by 100 (they had completed the topic of decimals by this time).
They figured out the conversion between kilometre and metre on their own. Some students were facing difficulties with the conversions. So, we got other students to help them as follows:
Let the child who understood be C1 and one who didn’t understand be C2.
C1: How many metres are there in 1 kilometre?
C2: It’s simple. 1000 metres
C1: Then in 2 kilometres?
C2: 2000 metres
C1: Then in 3 kilometres?
C2: 3000 metres
C1: Then in 14 kilometres?
And C2 got it and asked for more sums!!
However, on hindsight, I realized how to give a sense of metre as a length.
On day 3, we had a recap of the previous day’s discussion.
I decided to utilise the Dienes blocks (which were available in the school) to give them a sense of centimetre and metre.
Alternatively, the kit (flats, longs, units) shown in the figure can also be used. Each unit is 1cm along each dimension. Each of the longs of tens are 10 cm × 1 cm × 1 cm. So, if we line up 10 longs then the total length is 100 cm or 1 m.
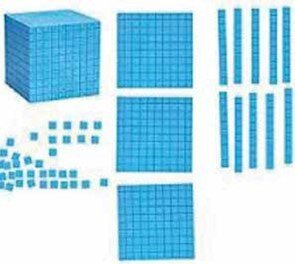
However, it would be difficult to create a length of 1 km using just one set since that would require 10,000 longs!
It is tempting to use the 10 cm × 10 cm × 1 cm flat to show a metre or ten 10 cm × 10 cm × 10 cm cubes to show a kilometre, but that does not convey the magnitude of the length to the students.
In other words, a lot of imagination is needed to connect 100 cm, a length, to the 100 unit-cubes that make a flat though they are numerically equal.
However, it is possible for students to visualise the following:
- What would be the total length of 5 longs arranged end-to-end?
50 cm = half metre = 0.5 m

- What would be the total length of 7 longs and 4 units?
74 cm = 0.74 m

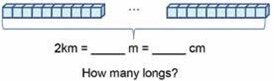
- How many longs would be needed to make a 2km long line?
2km = 2000m = 2000 × 100cm, so 20000 longs.
Thus, we discussed length in a child-centric way that I found to be effective because the students understood the concept and were able to correlate it with their daily experiences. Also, they were able to answer the questions we posed.
The flow was as follows:
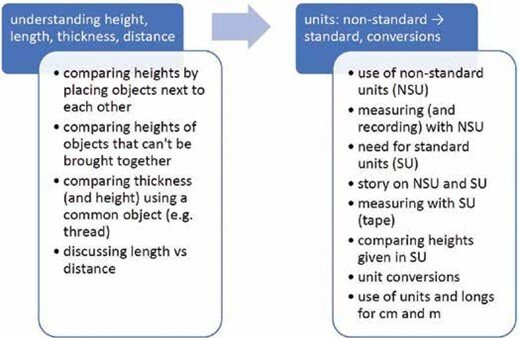
The students took active part in all the activities with a lot of enthusiasm and sincerity. The activities were designed to build up their understanding gradually.
Children got the scope to explore and measure, and this active engagement made their learning deeper.
The discussions after each activity helped in consolidating their understanding. Peer learning was evident as they helped each other.
A child, who was shy about asking the teacher, did not hesitate to ask a friend.
Thus, in two or three classes, the children went from knowing just the units and unit conversions to a deeper conceptual understanding of length, measuring things with various units and their conversions in an experiential way.
References
- At Right Angles PullOut (Measurements/मापन) available at At Right Angles_July_2015-Vol 4‑no-2-July 2015-Pullout-Measurement.
- Myller, Rolf How Big is a Foot (1962)
About the author:
ANKIT SHUKLA did his MBA and B Tech from Uttar Pradesh Technical University, Lucknow and joined the Fellowship Programme of Azim Premji Foundation in March 2017. After completing his fellowship, he was posted to Raigarh district and now works in the field of mathematics pedagogy.
The major part of his engagement includes the capacity enhancement of government school mathematics teachers with regard to content, perspectives and pedagogy of mathematics.
He also interacts with children of government schools. He has a keen interest in exploring different contexts and resources which clears misconceptions in mathematics.